Non-Toxic Home-Building: A 3-Pronged Approach to Healthy Indoor Air
Non-Toxic Home-Building: A 3-Pronged Approach to Healthy Indoor Air
We spend a whopping 90% of our time indoors, making the quality of the air we breathe a critical factor in our health and well-being. At JD Rock Construction, we're passionate about building dream homes that prioritize both aesthetics and a healthy living environment.
This blog post dives deep into a three-pronged approach to improve your indoor air quality and create a non-toxic haven:
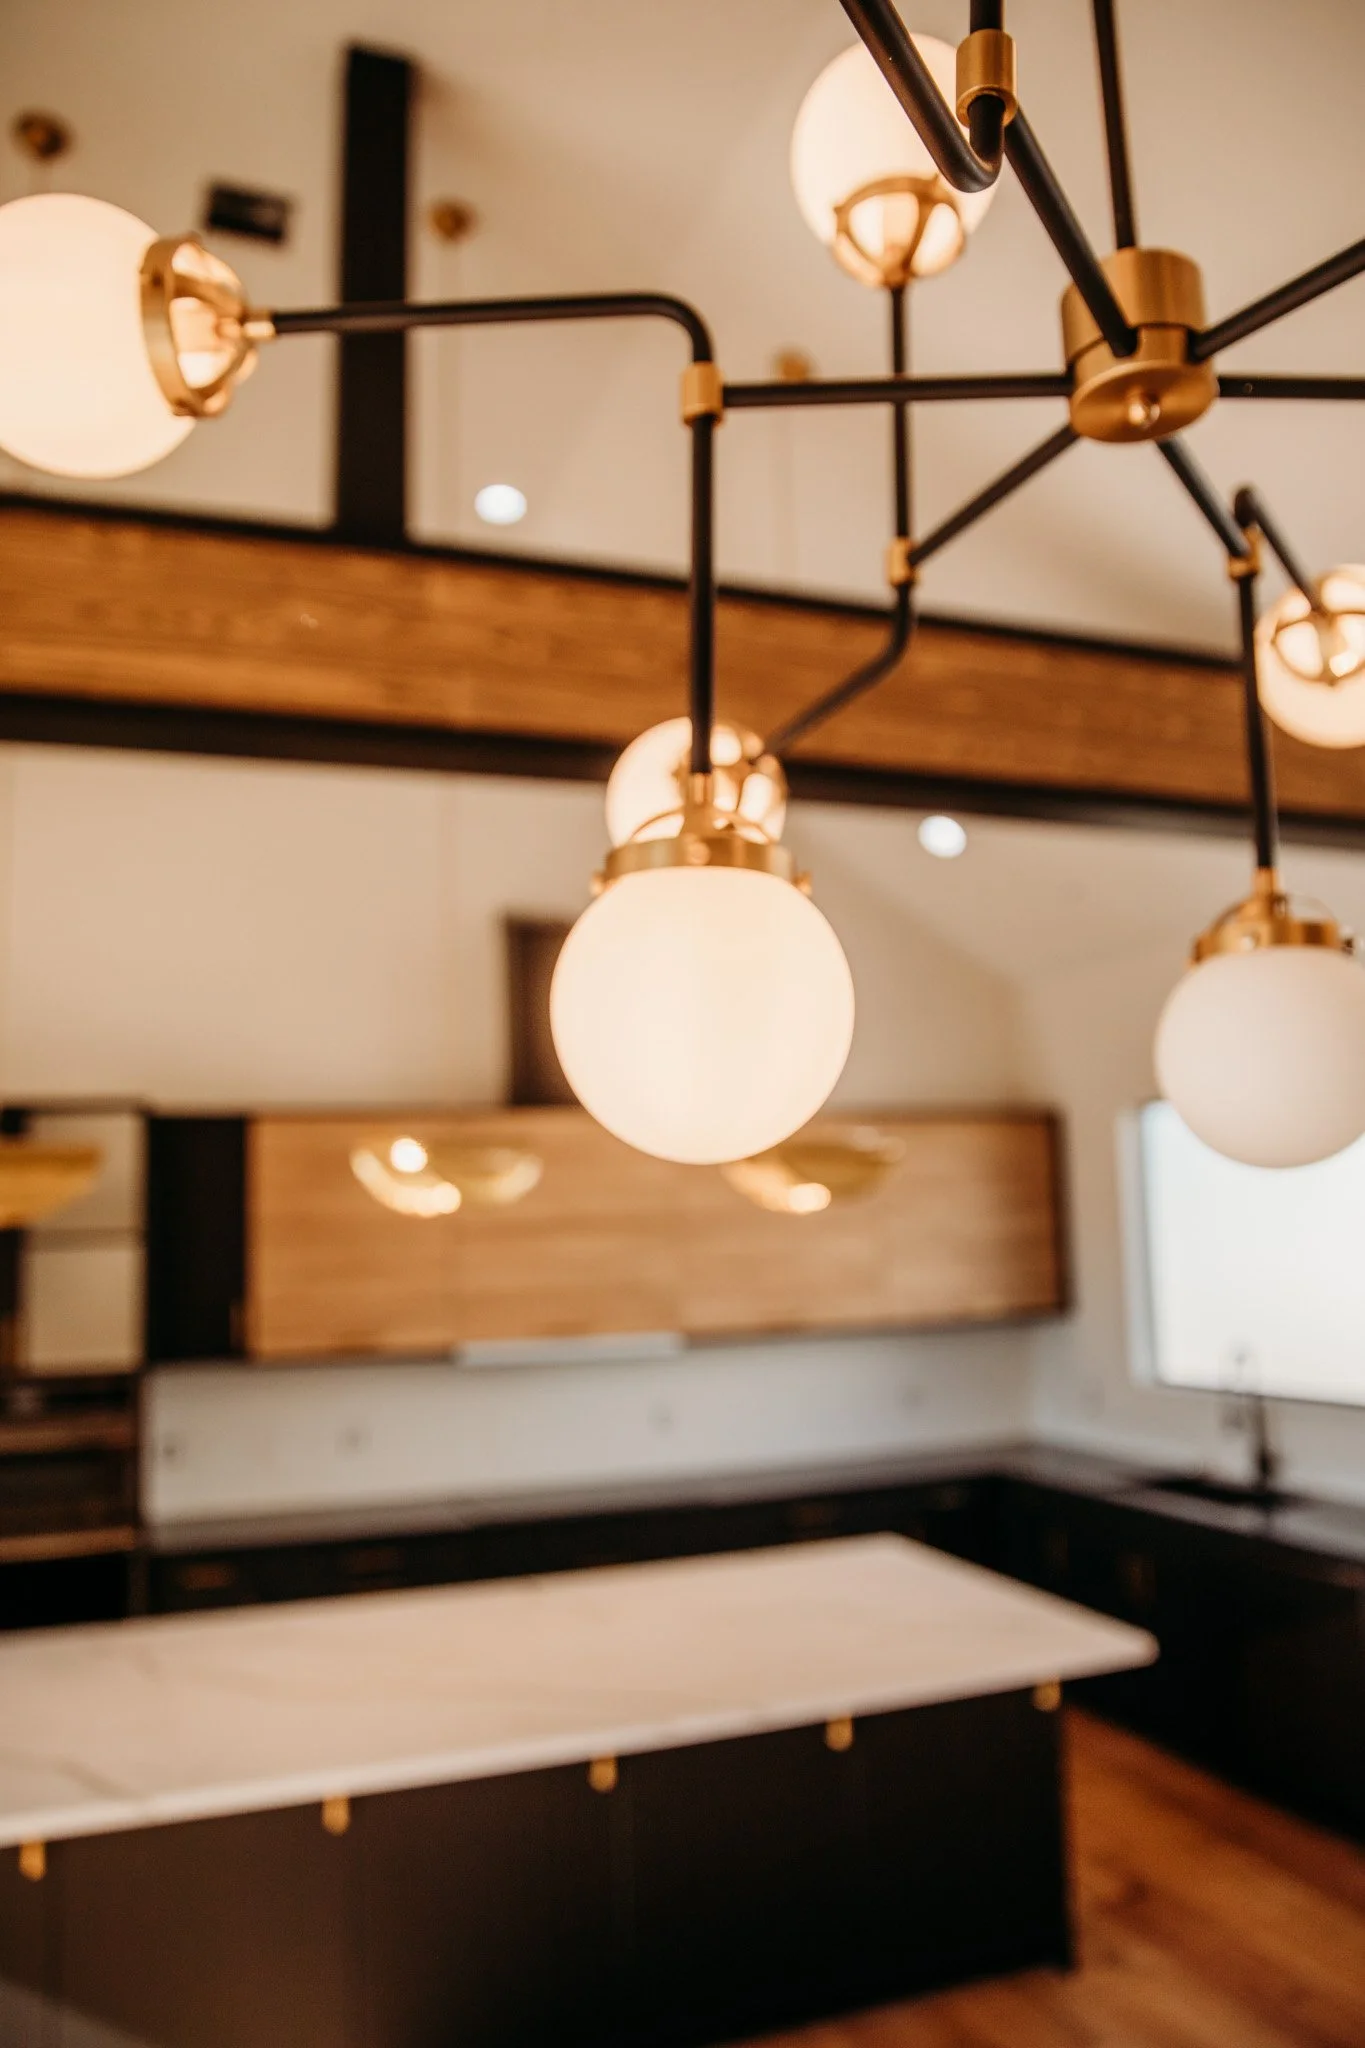
Prong #1: Source Control - Nip It in the Bud: This involves minimizing the sources of indoor air pollution from the get-go. We discuss common culprits like VOCs (Volatile Organic Compounds) and formaldehyde found in building materials, and explore non-toxic alternatives like solid wood, certified low-VOC materials, and natural stone countertops.
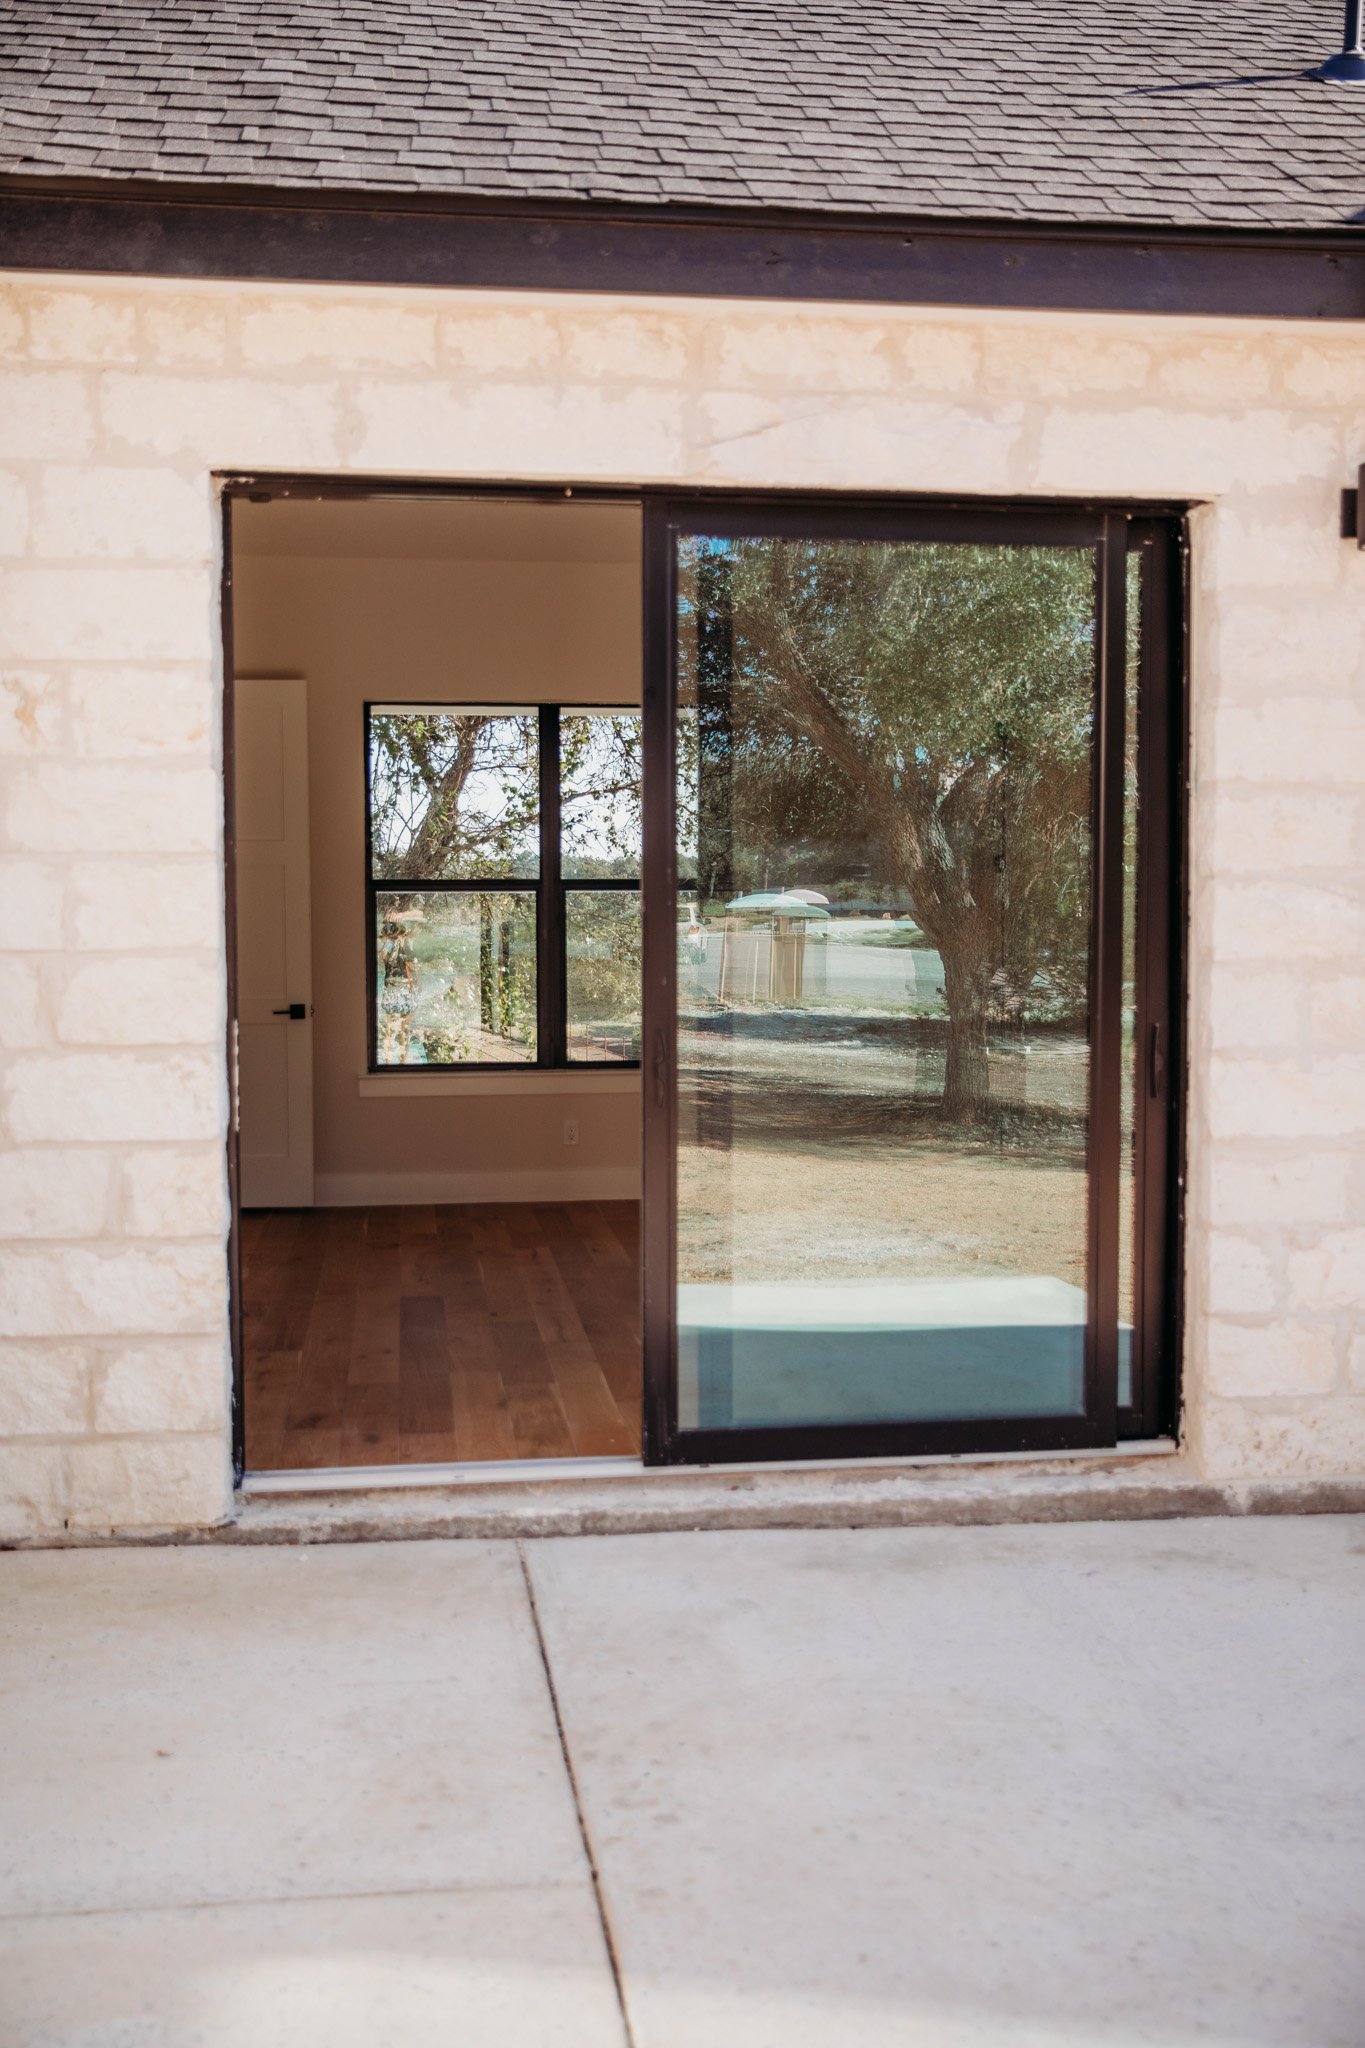
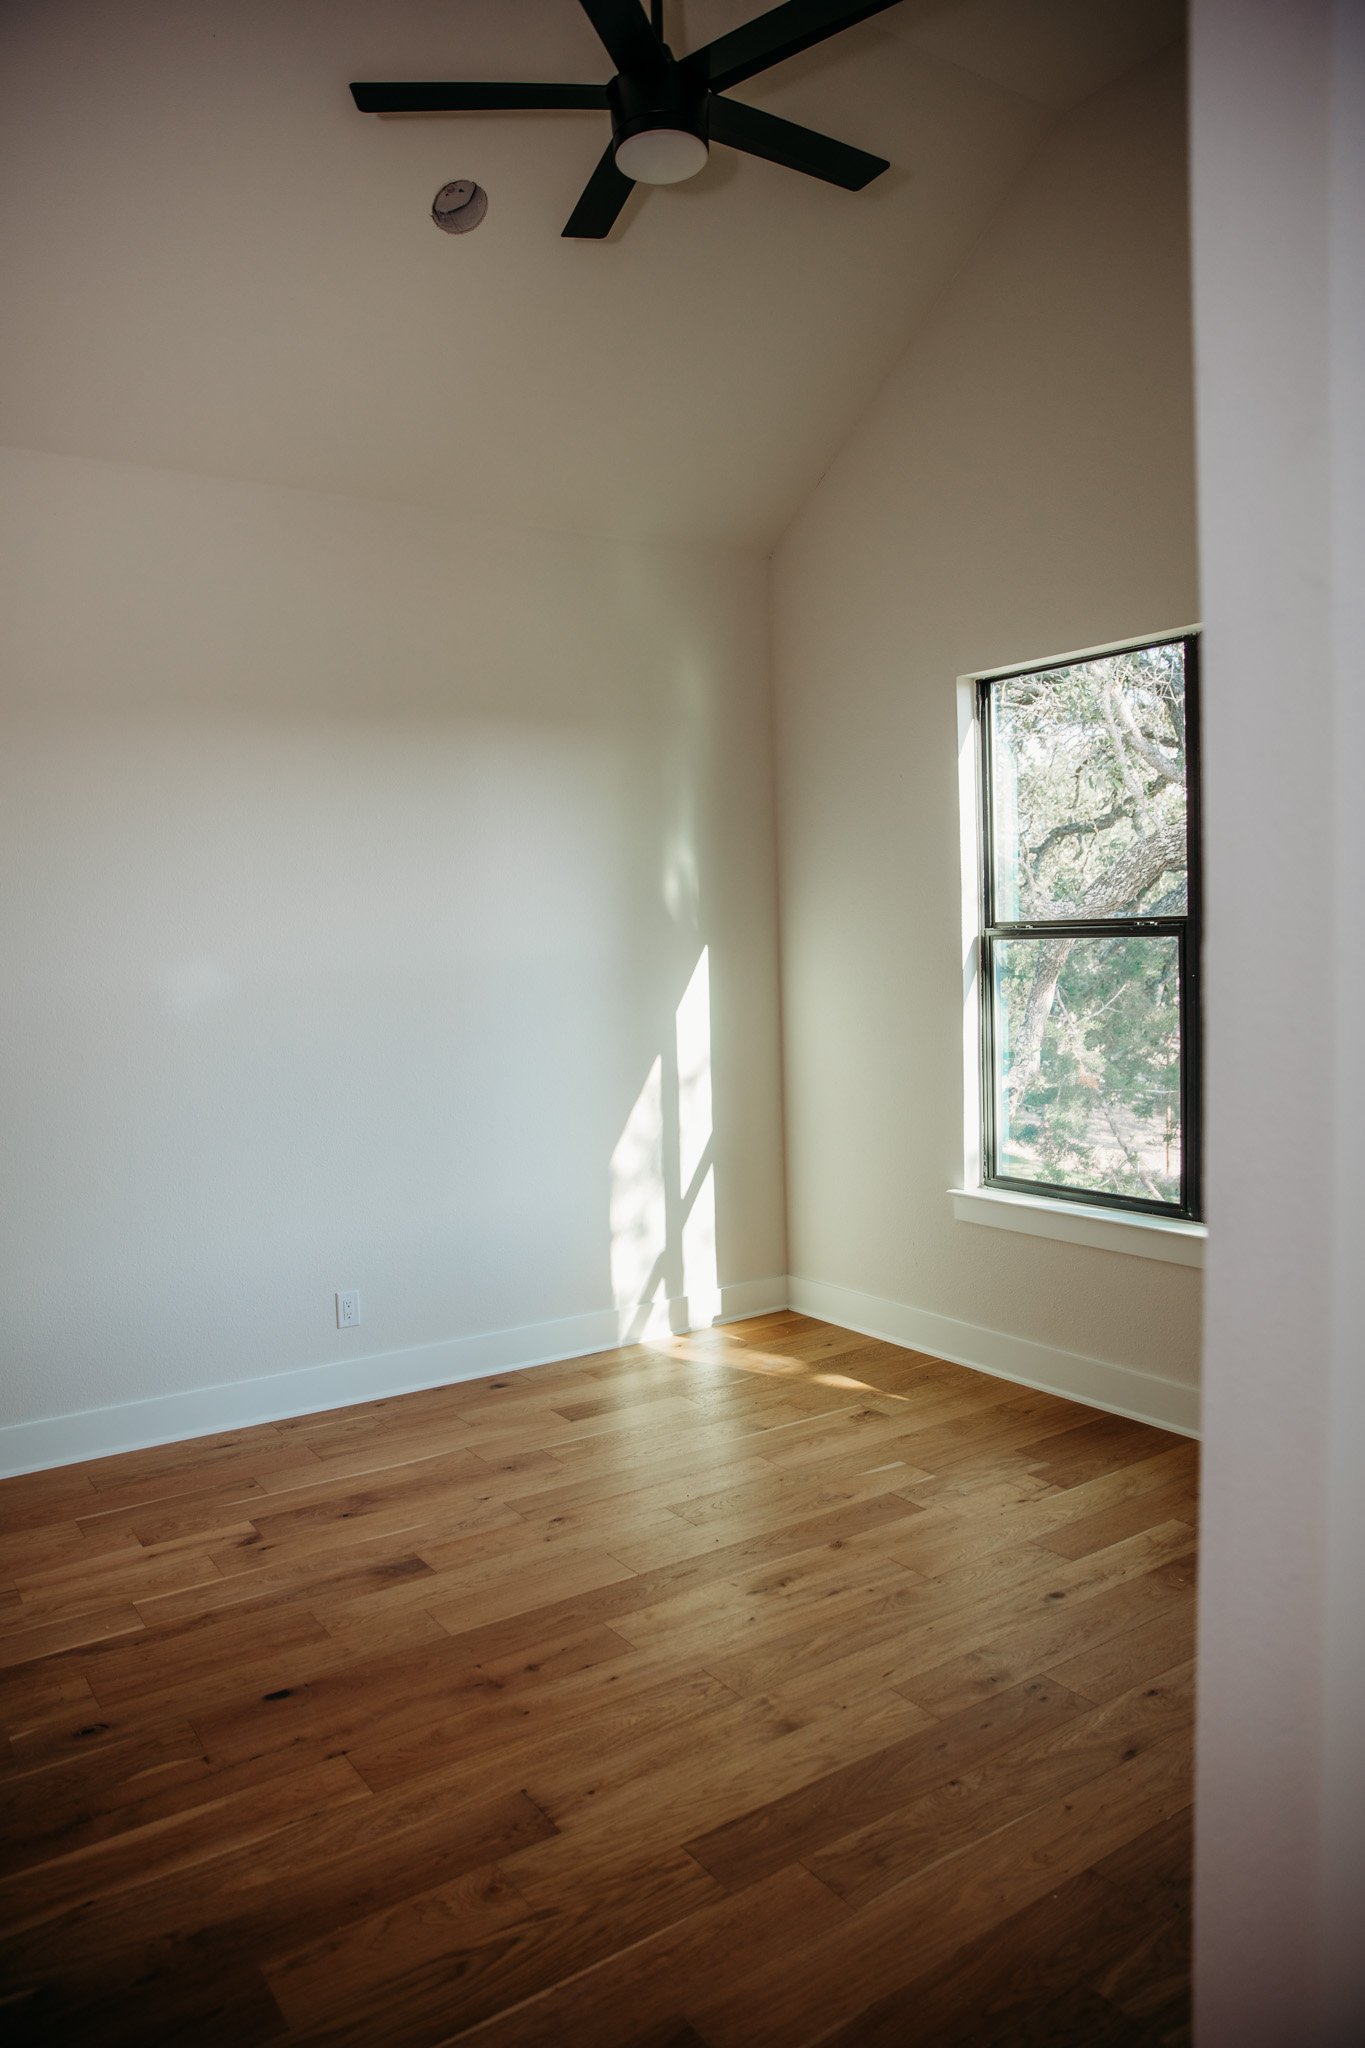
Prong #2: Ventilation - Let the Fresh Air In: This simple and affordable strategy involves opening windows and doors to dilute indoor pollutants and bring in fresh oxygen. We recommend checking your local air quality with a free app before opening up the windows.
Prong #3: Filtration - The Extra Layer of Protection: While ideally source control and ventilation will minimize the need for filtration, air purifiers with HEPA filters and upgrading your HVAC system's air filter to a MERV 13 or higher can provide an extra layer of protection.
We'll also explore additional tips for maintaining good indoor air quality, from the power of houseplants to the importance of regular vacuuming and maintaining a healthy humidity level.
Ready to breathe easy in your non-toxic dream home? This blog post provides valuable insights and practical steps to get you started. Contact JD Rock Construction today to discuss building a non-toxic, healthy home for you and your loved ones!
Let's face it, we spend a whopping 90% of our time indoors. That means the quality of the air we breathe inside our homes has a tremendous impact on our health and well-being. At JD Rock Construction, we're passionate about building custom homes that prioritize not just aesthetics, but also a healthy living environment for the whole family.
One crucial factor in achieving this is indoor air quality (IAQ). Indoor air can become polluted by various contaminants, impacting everything from respiratory health to sleep quality and even cognitive function. But fear not! Here's a breakdown of a three-pronged approach to improve your indoor air quality and breathe easy in your non-toxic, healthy home:

PC: https://doveeyesphotography.mypixieset.com/
Healthy Indoor Air Prong #1: Source Control - Nip It in the Bud
Think of this as the foundation for a healthy home. The key is to minimize the sources of indoor air pollution in the first place. Here's where choosing non-toxic building materials becomes crucial.
Chemicals of Concern:
Volatile Organic Compounds (VOCs): These are organic chemicals that easily evaporate at room temperature. They're found in paints, adhesives, sealants, carpeting, furniture, and cleaning products. Common VOCs include formaldehyde, benzene, toluene, and xylene.
Formaldehyde: This gas is a known carcinogen and can irritate the eyes, nose, and throat. It's found in pressed wood products like plywood, MDF (medium-density fiberboard), and some laminates. Flooring, walls, cabinets, furniture, etc. can all contain formaldehyde.
Flame Retardants: Added to furniture and building materials to slow the spread of fire, some flame retardants have been linked to endocrine disruption and developmental problems.
Common Sources of Toxic Contaminants:
Building materials: As mentioned earlier, conventional building materials like plywood, MDF, carpets, paints, adhesives, and sealants often off-gas VOCs.
Cleaning products: Many conventional cleaning products are loaded with harsh chemicals that contribute to indoor air pollution.
Personal care products: Fragrances and other chemicals in deodorants, air fresheners, scented candles, and more can release VOCs into the air.
Mold and mildew: Growth of mold and mildew can release allergens and irritants into the air.
Check out this blog post on mold prevention!
Non-Toxic Swaps for a Healthier Home:
The good news? You have options! The body of research and demand are growing, and more and more healthy alternatives are hitting the market. Here are some non-toxic swaps to consider during your custom build or remodel:
Building materials: Opt for solid wood when possible, certified low-VOC or VOC-free materials, bamboo flooring, cork flooring, natural stone countertops, and cork or rock wool insulation.
Some helpful product certifications to look for: GreenGuard Gold Certification, Cradle to Cradle Certified™, and the FloorScore Certification.
Check out this blog post on non-toxic insulation and this blog post on plywood!
Paints and finishes: Choose paints and finishes with low-VOC or zero-VOC formulations. There are also mineral-based and plant-based paint options available. Sherwin Williams and Benjamin Moore have zero VOC paint options. ECOS, AFM Safecoat, and Clare are healthier options for the more chemically sensitive.
Adhesives and sealants: Look for low-VOC or water-based adhesives and sealants. Once again, AFM Safecoat and ECOS have some good options to consider.
Check out this blog post on non-toxic glues!
Cleaning products: Ditch the harsh chemicals and switch to natural cleaning products made with vinegar, baking soda, hydrogen peroxide, Castille soap, and essential oils.
Bonus Tip: Download our FREE guide "10 Non-Toxic Swaps For Your Custom Home Build or Remodel"! It's packed with practical tips to help you create a healthier home environment for your family.
PC: https://doveeyesphotography.mypixieset.com/
Healthy Indoor Air Prong #2: Ventilation - Let the Fresh Air In!
This is the simplest and most affordable way to improve your indoor air quality. Open those windows and doors and let the fresh air circulate. It dilutes indoor pollutants and brings in oxygen, your body's best friend.
Pro Tip: Before throwing open the windows, check your local air quality with a free app like AirNow. You don't want to be exchanging fresh air for polluted outdoor air! This is especially pertinent if you live in a densely populated area.
When building from the ground up, we recommend an energy recovery ventilator (ERV). These systems work by continuously exchanging indoor and outdoor air while regulating temperature and humidity for overall energy conservation.
Healthy Indoor Air Prong #3: Filtration - The Extra Layer of Protection
Ideally, by controlling the source of contaminants and ventilating regularly, you'll minimize the need for air filtration. However, let's be real, we can't control everything. So, air filters can provide an additional layer of protection.
Air Purifiers:
While air purifiers can be quite effective, they can also get pricey. Consider them when source control and ventilation alone aren't enough. Look for air purifiers with HEPA (High Efficiency Particulate Air) filters to capture dust, pollen, and other allergens and a carbon filter for VOC capture. A fantastic and semi-affordable option to consider is Air Doctor.
HVAC Filters:
A more affordable option is to upgrade your HVAC system's air filter. The American Lung Association recommends a MERV (Minimum Efficiency Reporting Value) rating of 13 or higher for capturing smaller particles. However, keep in mind that older HVAC systems might struggle with the increased resistance of a higher-MERV filter. It's always best to consult with an HVAC professional to ensure your system can handle a higher-rated filter without compromising airflow or efficiency.
Here are some additional things to consider when choosing an HVAC filter:
Filter Size: Make sure the filter you choose is the correct size for your HVAC system.
Replacement Schedule: Change your air filter regularly, typically every 1-3 months depending on the filter type and your environment. When remodeling, you need to replace more frequently as there are more contaminants to filter from construction.
Filter Pleats: Opt for pleated filters as they offer more surface area for capturing dust and allergens compared to flat filters. The 3M Filtrete 1900 is a high MERV filter with many positive reviews stating the pleats helped their HVAC system tolerate the increased MERV rating.
Thickness: A filter with a higher MERV is often better tolerated when 4-5 inches in thickness as opposed to 1 inch.
More Tips For Healthy Indoor Air
Now that you're armed with this three-pronged approach, let's explore some additional steps you can take to improve your indoor air quality:
Invest in Houseplants: Certain houseplants act as natural air purifiers by absorbing VOCs and other pollutants. Snake plants, spider plants, and peace lilies are all excellent choices.
Reduce Humidity: Mold and mildew thrive in damp environments. Maintain a healthy humidity level between 30% and 50% with a dehumidifier if necessary. An ERV will also help regulate humidity.
Minimize Dust Collectors: Clutter and textiles harbor dust and allergens. Opt for minimal hard surfaces and choose washable rugs and furniture fabrics.
Regular Vacuuming: Vacuum carpets and rugs regularly with a HEPA filter vacuum to trap dust and allergens.
Take Off Your Shoes at the Door: Shoes can track in MANY pollutants from the outdoor world. Encourage a "no shoes inside" policy to reduce dirt and allergens.
Let New Furniture Air Out: New furniture can off-gas VOCs. Allow new furniture to air out in a well-ventilated space for several days before bringing it indoors.

PC: https://doveeyesphotography.mypixieset.com/
Building a Non-Toxic Home With JD Rock Construction
At JD Rock Construction, we understand that a healthy home is crucial for a healthy family. We're committed to using non-toxic building materials whenever possible and employing strategies for optimal indoor air quality. Here's how we can help you achieve your family’s non-toxic dream home:
Non-Toxic Material Expertise: Our team is certified in healthy building materials and can guide you in selecting non-toxic options for your project.
Transparency and Communication: We believe in open communication. We'll discuss the potential sources of indoor air pollution, mitigation strategies, and provide continuous updates throughout construction.
Building a non-toxic, healthy home is an investment in your family’s health and well-being. By taking control of indoor air quality, you can create a healthier and more supportive environment for ALL for many years to come.
Contact JD Rock Construction today to discuss your vision and how we can help you protect your family with a healthy home!
Remember, small steps can lead to big improvements. Analysis paralysis and anxiety are not helpful on the journey toward healthy living. Start implementing some of these tips today and take a step towards a healthier home environment!
Bonus Tip: Share this blog post with your friends and family! Let's all work together to create healthier homes for healthier families.
Why Children Are More Vulnerable To Toxic Home Builds & Remodels (And What To Do About It!)
Discover why protecting your family from hidden toxins during custom home construction or renovation is crucial. From understanding children's vulnerability to identifying common toxins like lead and formaldehyde, learn actionable tips to ensure a safe and healthy environment for your loved ones. With insights on choosing safe building materials and navigating the construction process with care, find out how to partner with a non-toxic home builder for a healthier home in the San Antonio area.
Children depend on adults for everything, including protection from environmental threats. While building or remodeling your home is exciting, what if it puts your children's health at risk? Unfortunately, hidden toxins in paint, flooring, water, air, and elsewhere can pose a serious threat to developing bodies.
This blog explores the unsettling truth regarding children’s increased vulnerability to environmental toxins common in home builds and remodels. Unlike adults, their organs and immune systems are still under construction, making them less equipped to fight off these harmful substances.
Here's what you'll learn:
Why children are anatomically, physiologically, and behaviorally more susceptible to toxins during a home build or renovation.
Where toxins like lead, mercury, arsenic, formaldehyde, and VOCs may lurk in your home.
Tips for protecting children during construction: Gain actionable advice on open communication with contractors, lead testing, limiting exposure, ventilation strategies, and choosing safe building materials.
How to take action and create a safe, healthy home for your little ones.
PC: https://doveeyesphotography.mypixieset.com/
Why are children more vulnerable to environmental toxins?
Children's bodies are still developing. Their organs and immune systems are immature and less equipped to detoxify and eliminate harmful substances. Additionally, their behavior and physiology put them at a higher risk of exposure .
Understanding Anatomy, Organ Immaturity, and Behavior:
Respiration: Compared to adults, children breathe more air in proportion to their body weight. This means they inhale more dust, chemicals, and other pollutants present in the air.
Increased Hand-to-Mouth Activity: Young children explore the world through their mouths, putting them at risk of ingesting dust, lead paint chips, or other contaminated objects.
Skin Absorption: Children's skin is thinner and more permeable, allowing toxins to enter the bloodstream more readily through contact.
Developing Organs: Organs like the brain, lungs, and immune system are still maturing in children. These organs are less equipped to eliminate toxins and more susceptible to lasting negative effects.
Higher Water Intake: Children also have a proportionately larger daily water intake. This means they may ingest more contaminants present in drinking water.
Behavioral Considerations: Children's curiosity and tendency to explore their environment can put them at an additional disadvantage. They might not understand the dangers of lead paint chips or contaminated dust, increasing their risk of accidental ingestion.

Where Might Toxins Be Found in Your Home Build or Remodel?
Lead:
Primary Concern: Lead paint.
Locations: Homes built before 1978 may have lead-based paint on walls, trim, doors, and even window sills. Lead dust can also be created during renovation projects that disturb lead paint.
Mercury:
Primary Concern: Fluorescent bulbs and certain thermostats.
Locations: Older fluorescent bulbs can contain mercury. Consider using LED alternatives during a remodel. Some older thermostats may also contain mercury.
Arsenic:
Primary Concern: Treated wood and contaminated soil.
Locations: Arsenic-treated wood can be used for decks, fencing, or even some types of landscaping timbers. Settling dust from contaminated soil can enter your home.
Formaldehyde (this one is a biggie in construction):
Primary Concern: Pressed wood products, adhesives, and some insulation materials.
Locations: Particleboard, plywood, and MDF (medium-density fiberboard) are all common building materials that can emit formaldehyde. These are often used in cabinets, furniture, and flooring. Urea-formaldehyde adhesives are used in some plywood and particleboard products. Spray foam insulation can also off-gas formaldehyde. (Check out this blog post on non-toxic insulation.)
Volatile Organic Compounds (VOCs):
Primary Concern: Paints, stains, varnishes, adhesives, and cleaning products.
Locations: During construction or remodeling, VOCs can be emitted from these products as they dry or cure. Opting for low-VOC alternatives can significantly reduce exposure.

PC: https://doveeyesphotography.mypixieset.com/
How To Protect Children During Home Construction and Remodeling
Open Communication with Your Contractor: Discuss your concerns about environmental toxins and safety from the very beginning. Choose a contractor knowledgeable in low-VOC materials and lead-safe practices (if remodeling an older home).
Lead Testing: If your home was built before 1978, have it tested for lead paint by a certified professional. If lead is found, don't attempt to remove it yourself. Hire a lead-abatement contractor who can safely remove the lead paint.
Limit Time Spent in the Construction Zone: Restrict your children's access to the construction area to minimize their exposure to dust and fumes. Avoid site visits during active construction and keep your kids out of the house during a renovation.
Check out this previous blog “Should You Live In Your Home While Renovating?”
Ventilation Is Your Friend: Open windows and doors whenever possible during and after construction to promote air circulation and remove lingering odors. This helps remove dust particles and VOCs that may off-gas from new materials. This is also important to consider when selecting a move-in date for a new home as you want to ensure all materials have completed off-gassing.
Invest in Safe and Healthy Building Materials: Super important! Work with your contractor to choose low-VOC paints, adhesives, and building materials whenever possible. These products emit fewer harmful chemicals and can create a healthier indoor environment for your family.
Download “10 Non-Toxic Swaps For Your Custome Home”
Building a healthy home is an investment in the health and well-being of your family. By understanding where you and your family are vulnerable, you can create a safe and nurturing environment where even the littlest ones thrive!
P.S. Curious about non-toxic materials to use during your renovation? Download “10 Non-Toxic Swaps For Your Custom Home”

Should You Live In Your Home During A Renovation?
Non-Toxic Home Remodel- To stay or not to stay. Unveiling the Hidden Toxins in Your Home Renovation
Planning a home renovation is exciting! But have you considered the hidden health risks lurking beneath the fresh paint and gleaming countertops? This blog post explores the world of off-gassing, the release of harmful chemicals (VOCs) during construction. Learn how to navigate a remodel while minimizing your exposure to toxins, discover tips for living on-site (if you're brave!), and ultimately decide whether to stay or relocate during your dream home transformation. Breathe easy and create a healthy home for your loved ones – read on!
Deciding whether to live in your home during a remodel can be a tough call, especially if non-toxic living is a priority. On the one hand, the prospect of double rent or mortgage payments and the upheaval of moving can be daunting. On the other hand, enduring the dust, chemicals, noise, and disruption of a major renovation project while living in the home can be equally challenging. In this blog post, we’re exploring the essential considerations, focusing on minimizing exposure to toxins often released during renovations, so you can make an informed choice that prioritizes your family's health, well-being, and budget!
Summary:
Health Risks: Minimize exposure to toxins (VOCs, dust) released during renovations.
Ventilation Challenge: Balance fresh air and toxin release with uncomfortable temperatures caused by open windows/doors.
Living with Contractors: Expect disruption to daily routines and potential project delays.
Minimize Toxin Exposure On-Site (for the Brave): Utilize air purifiers, dust control measures, and strategic cleaning routines.
The Final Verdict: Consider project size, budget, and tolerance for disruption. Open communication with your contractor is crucial.
Want to renovate with non-toxic building materials? Download “10 Non-Toxic Swaps For Your Custom Home or Remodel”
PC: https://doveeyesphotography.mypixieset.com/
Understanding the Risk: Off-Gassing and Toxins
When it comes to remodeling, off-gassing is a major concern. This process involves the release of volatile organic compounds (VOCs) from building materials, furniture, and cleaning products, which can pose serious health risks. Compounds like formaldehyde, benzene, and toluene can irritate the respiratory system and have been linked to various health issues, including headaches and cancers (yikes!).
Moreover, the demolition phase itself can stir up dust containing lead paint, asbestos fibers (if your home was built before the 1980s), and other harmful substances. The risk of exposure to these toxins is significantly higher when you are living in the midst of a renovation. Selecting non-toxic building materials with minimal off-gassing is even more important when living in your home during a renovation. Check out this blog post on non-toxic plywood!
Ventilation: A Double-Edged Sword
Proper ventilation is crucial for minimizing toxin exposure during remodeling. While opening windows and doors helps dissipate VOCs and dust, it also invites weather-related discomfort. Enduring extreme temperatures (like a South Texas Summer) while surrounded by construction noise and open windows isn't anyone's idea of comfort.
The Contractor Tango: A Balancing Act
Sharing your living space with a construction crew for weeks or months can be disruptive. The constant flow of workers, tools, and materials can make it difficult to maintain a sense of normalcy. Simple tasks like cooking dinner or getting ready for work can become an obstacle course. Further, a construction crew trying to navigate your routine and schedule can also slow down the project's overall efficiency.
Beyond the Obvious: Additional Considerations
There are other factors to weigh:
Pets and Children: The presence of pets and young children can be a significant concern during a remodel. Keeping them safe from dust, debris, and potentially hazardous materials requires extra vigilance. At least relocating pets and children during active construction might be necessary.
Noise and Disruption: Constant hammering, sawing, and general construction noise can be stressful and disruptive to work-from-home individuals or those with noise sensitivities (or any normal human being for that matter).
Plumbing and Electrical Disruptions: Depending on the scope of your remodel, you might face temporary disruptions to your home's plumbing and electrical systems. This can significantly impact your daily routine and comfort level.
Mental and Emotional Toll: Living in a construction zone can be psychologically taxing. The constant mess, noise, and disruption can take a toll on your mental well-being and patience.

PC: https://doveeyesphotography.mypixieset.com/
How To Minimize Toxin Exposure When Living In Your Home During A Renovation
If, after careful consideration, you’re feeling brave and decide to stay in your home during the remodel phase, here are some tips to minimize your exposure to toxins:
Seal Off the Renovation Zone: Work with your contractor to create a contained work area using plastic sheeting and doorway barriers. This minimizes dust and VOCs spreading throughout the rest of your living space.
HEPA + Carbon Air Purifiers: Invest in high-efficiency particulate air (HEPA) purifiers with activated carbon filters for the rooms you'll be occupying. HEPA filters capture dust particles, while the carbon filters absorb harmful chemicals and VOCs, providing a two-pronged approach to cleaner air.
Select Non-Toxic Construction Materials: Minimize your exposure to VOCs with healthier material choices. Check out this blog post on non-toxic glues!
Schedule Strategically: Coordinate with your contractor to schedule noisy or dusty work for times when you can be out of the house- i.e. during work/school hours or weekend trips.
Minimize Time Spent in the Renovation Zone: Limit your time spent in the area undergoing renovation. If possible, create a temporary living space within your home, away from the construction zone.
Dust Control Measures: Encourage your contractor to implement dust control measures like using vacuums with HEPA filters and wetting dusty materials before demolition.
Clean Up Daily: Maintain a strict cleaning routine to remove dust and debris from surfaces throughout your home. Focus on frequently used areas like kitchens, bathrooms, and bedrooms.
Change Clothes: Dedicate specific clothing for use inside the renovation zone and change into clean clothes before re-entering your living areas.
Shower Before Bed: Showering before bed helps remove dust particles that may have settled on your skin and hair throughout the day.
Consider Professional Deep Cleaning: Once the major renovations are complete, consider a professional deep cleaning service to remove lingering dust and debris from your entire home. This professional cleaning should ideally utilize HEPA vacuums and other tools specifically designed for post-construction cleanup. Deep cleaning is standard practice after building a custom home but may need to be specifically requested for a renovation.
The Final Verdict: Should You Live in Your Home During a Renovation?
Ultimately, the decision of whether to stay in your home during a remodel is a personal one- but we HIGHLY recommend relocating if at all possible! Weigh the hassle of double rent or temporary housing against the potential health risks and disruption of living amidst construction.
Here’s a summary of key factors to consider when making your decision:
The scope of the remodel: A small bathroom renovation might be more manageable than a whole-house project.
The length of the project: Shorter projects are easier to endure while living on-site.
Your personal health: If you have respiratory issues or allergies, exposure to dust and toxins might be more problematic.
Your budget and relocation options: The cost of temporary housing can be a significant factor, but consider family and friends who may be willing to take you in (we know-easier said than done!).
The presence of infants and children: Please consider at least relocating these vulnerable guys to stay with family during peak construction.
Your tolerance for disruption: Consider how well you and your family can cope with the noise, mess, and inconvenience of a renovation.
No matter which path you choose, prioritizing open communication with your contractor is key. Discuss your concerns about dust, VOCs, and minimizing disruption. A reputable contractor will work with you to develop a plan that best serves your priorities.
By understanding the challenges and taking the necessary precautions, you can create a safe and healthy environment for yourself and your family, even during a renovation!
P.S. Curious about non-toxic materials to use during your renovation? Download “10 Non-Toxic Swaps For Your Custom Home or Remodel”

Non-Toxic Home-Building: Navigating Glues and Adhesives for Your Healthy Home-Build or Remodel
Building a custom home should be an exciting and fulfilling experience. But for health-conscious families, concerns about low-toxic building materials can cast a shadow on the process. The good news is, you don't have to compromise on quality to prioritize your family's well-being. This guide delves into the world of glues and adhesives, often overlooked yet crucial components in construction. Understanding these seemingly small elements empowers you to make informed choices with your custom home builder, ensuring a healthy and beautiful space for generations to come.
Learn more and discover:
How to choose non-toxic or low-VOC glues and adhesives for your project.
Popular options like Titebond III, ECOS Wood Glue, and Gorilla Wood Glue, each with their own strengths and considerations for healthy home construction.
The importance of open communication with your builder to ensure they use safe building materials throughout, including low-VOC construction adhesives for flooring.
If you are searching for non-toxic home-building materials or low-VOC options, you have come to the right place! Building a healthy home for your family shouldn’t mean sacrificing quality. Our focus today is to help you understand the glues and adhesives used in construction so you can make informed choices throughout your healthy home-building journey.
Key Points For Non-Toxic Glues:
Healthy home builders prioritize low-toxic building materials, including glues and adhesives.
Popular options like Titebond III, ECOS Wood Glue, Gorilla Wood Glue, and AFM Almighty Adhesive offer varying strengths and weaknesses for healthy home construction.
Consider project needs, health concerns, material types, and budget when choosing the right non-toxic or low-VOC glue or adhesive.
Titebond III is an excellent choice where affordability, availability, performance, and low VOC content all intersect.
Open communication with your builder is key to ensuring they use safe building materials throughout the construction process, including low-VOC construction adhesives for flooring.
Building a healthy home is achievable! This guide empowers you to make informed choices and collaborate with your builder to create a safe and beautiful home for your family.
Looking for more non-toxic home-building materials? Download “10 Non-Toxic Swaps For Your Custom Home”!

Prioritizing a Healthy Home, Not Compromising Quality:
Your custom home builder must share your commitment to protecting your family's health. This means prioritizing non-toxic and low-VOC materials, without compromising your home’s quality or performance. Thankfully, several glues and adhesives offer both safety and strength.
Non-Toxic Glue Options for Your Home:
Titebond III Ultimate Wood Glue: A classic choice known for its affordability, bond strength, and water-resistance. While low in VOCs, it's not entirely solvent-free.
ECOS Wood Glue: This zero-VOC champ is ideal for sensitive environments and boasts good bond strength for most woodworking projects. Its price point might be slightly higher than some options.
Gorilla Wood Glue: Renowned for its exceptional bond strength, making it perfect for demanding tasks. However, it contains formaldehyde, a concern worth noting, and isn't solvent-free.
AFM Almighty Adhesive: This high-performance option goes beyond wood, bonding diverse materials with strong, water-resistant results. It's solvent-free, environmentally friendly, and exceeds all VOC regulations, but carries a higher price tag.
Choosing the Right Non-Toxic Glue for Your Project:
The best non-toxic glue depends on your specific needs and priorities. Discuss these with your builder:
Project requirements: For critical structural elements, prioritize superior bond strength like that offered by Titebond III or Gorilla Wood Glue.
Health concerns: If minimizing VOCs is paramount, ECOS Wood Glue or AFM Almighty Adhesive are excellent.
Material types: If bonding diverse materials beyond wood, AFM Almighty Adhesive is a great choice.
Budget considerations: Titebond III often stands out for its affordability.
PC: https://doveeyesphotography.mypixieset.com/
What is the best non-toxic glue for building a healthy home?
We, personally, find Titebond III to be one of the best choices where affordability, availability, performance, and low-VOC content all intersect.
Healthy Home Construction Beyond the Glue:
Remember, glues are just one piece of the puzzle. Trust a builder who uses low-toxic materials throughout the construction process, from paints and flooring to insulation and ventilation. Open communication and transparency are key to ensuring your healthy home prioritizes both your family's health and high-quality craftsmanship.
Additional Tips:
Ask your builder for detailed information on the specific glues and adhesives they use and their VOC content.
Look for certifications like GREENGUARD Gold or Cradle to Cradle Certified, indicating low-VOC emissions.
Prioritize good ventilation during and after construction to minimize exposure to any VOCs.
Building a healthy and beautiful home is possible! By prioritizing healthy home construction and collaborating with a builder who shares your values, you can create a space that fosters well-being for many generations.
P.S. Looking for more non-toxic home-building materials? Check out this blog post on plywood and download “10 Non-Toxic Swaps For Your Custom Home”!

PC: https://doveeyesphotography.mypixieset.com/

Non-Toxic Home-Building: Plywood Edition
Discover the world of non-toxic home-building with our latest blog post, "Non-Toxic Home-Building: Plywood Edition." Plywood, a staple in construction, plays a pivotal role in shaping your home's structural integrity. Dive into the uses of plywood, explore the shift from plywood to Oriented Strand Board (OSB), and understand the potential risks associated with off-gassing.
https://doveeyesphotography.mypixieset.com/
Welcome back to our continued series on non-toxic home-building! This week we are focusing on a longtime staple in the realm of construction materials: plywood. In the quest for a non-toxic home, it's essential to delve into the world of plywood, considering its uses, the prevalence of OSB (Oriented Strand Board), the potential dangers of off-gassing, and how to make choices that align with your health-conscious goals.
Uses of Plywood in Home Construction
Plywood is a versatile material, often employed in sheathing, flooring, and roofing. Its layers of thin wood veneers glued together create a robust and durable panel, providing structural integrity to various elements of your home.
OSB vs. Plywood: A Shift in Preference for a Non-Toxic Home
In recent years, Oriented Strand Board (OSB) has gained popularity as a substitute for plywood. However, it's crucial to acknowledge that OSB might not be the healthiest choice due to concerns related to off-gassing and toxicity.
Dangers of OSB and the Importance of Structurally Approved Plywood
OSB, while structurally sound, can pose risks in terms of off-gassing. Off-gassing is the release of volatile organic compounds (VOCs), and in the case of OSB, formaldehyde is a key player. To ensure a healthier living space, opting for structurally approved plywood for sheathing becomes paramount.
Why emphasize structurally approved? Soy-based glues and bamboo forms of plywood are growing in popularity as the more health and environmentally-conscious options. However, these types are not structurally approved for sheathing, decking, flooring, etc. They are best used for furniture and cabinets. Make sure to use plywood approved for external and structural use for a long-lasting, durable home.

Understanding Urea Formaldehyde vs. Phenol Formaldehyde
Plywood and OSB contain adhesives, and understanding the types of adhesives used is crucial. Urea formaldehyde, a common adhesive, can release formaldehyde over time. In contrast, phenol formaldehyde is a safer alternative, known for lower emissions.
Recommended Brands of Non-Toxic Plywood
Selecting the right plywood involves considering not just the material but also the brand. Some reputable brands prioritize non-toxicity and sustainability. Researching and choosing wisely can align your construction with your commitment to a healthier home.
Both Weyerhaeuser and Roseburg manufacture plywood with phenol formaldehyde which can be purchased locally from lumber yards.
Warm and Humid Climates: A Challenge for Plywood Off-Gassing
Warm and humid climates can accelerate formaldehyde off-gassing from plywood. This is particularly relevant in our South Texas climate. The combination of higher temperatures and humidity levels facilitates chemical reactions, leading to the breakdown of formaldehyde molecules and their release into the air. In such conditions, the wood fibers in the plywood may swell, creating spaces for formaldehyde to escape more easily.
Tips to Minimize Off-Gassing in Warm and Humid Climates:
Ventilation: Ensure proper ventilation by opening windows and doors to allow fresh air circulation.
Acclimation: Allow plywood to acclimate to the climate before use by storing it in the installation environment for several weeks.
Sealing: Apply a sealant or paint to the plywood to create a barrier, preventing formaldehyde from evaporating into the air. (Make sure the sealant is low-VOC!)
By incorporating these tips into your construction plans, you're taking proactive steps to reduce off-gassing, creating a healthier indoor environment for you and your family. Every choice in construction contributes to the overall well-being of your home.
If you walk away with nothing else from this blog, remember this- use plywood made with phenol-formaldehyde and VENTILATE.
P.S. Looking for more non-toxic home-building materials? Check out this blog post on glues and adhesives and download “10 Non-Toxic Swaps For Your Custom Home”!
https://doveeyesphotography.mypixieset.com/

Non-Toxic Home-Building: Mold Prevention Strategies
Mold, a type of fungus that thrives in moist environments, can pose significant health risks and create an unhealthy living space. When building a new home, it's crucial to implement effective mold prevention strategies to safeguard your health and the integrity of your property. This blog discusses essential mold prevention measures to consider, including air sealing with house wrap, proper window flashing, sealing all openings, and using cement backing for wet walls. By incorporating these strategies, you can create a healthier, mold-free home that promotes well-being and protects your investment.
https://doveeyesphotography.mypixieset.com/
Wanting to build a non-toxic home that doesn’t compromise the health of your loved ones?
Here is one crucial truth: A home with all of the “healthiest” materials is meaningless if infested with mold.
Mold prevention might not be the sexiest topic, but trust us, it's the unsung hero in ensuring a safe and wholesome living space. The non-toxic home conversation is hollow without a discussion of mold prevention.
The good news is that building a new home with superior construction techniques focused on weather and moisture sealing is your best strategy for preventing mold from ever becoming a threat.
Side note: if you want to dive even deeper into non-toxic home building, download “10 Non-Toxic Swaps For Your Custom Home”!
Mold Prevention Construction Strategies
1.Air Sealing with House Wrap
Air sealing with house wrap is an essential step in preventing mold growth. House wrap is a moisture-resistant barrier that is applied to the exterior walls of a home. It helps to prevent moisture from entering the walls, which can create a breeding ground for mold.
When choosing house wrap, look for a product that is specifically designed for air sealing. It should be water-resistant, vapor-permeable, and durable. Proper installation is critical to ensure that the house wrap is effective. It should be applied tightly and sealed at all seams and openings.
Exterior brand: https://475.supply/products/solitex-mento-1000
Interior brand: https://475.supply/products/intello-plus
2. Window Flashing
Properly installed waterproof flashing is essential in keeping mold at bay. Flashing is a material that is installed around windows to prevent water from entering the walls. It should consist of a waterproof material, such as metal or rubber.
When installing window flashing, make sure that it extends at least four inches beyond the window frame on all sides. It should also be sloped away from the window to direct water away from the walls.
3. Sealing Openings
Sometimes, the tiniest gaps can cause the biggest troubles. All openings in a home, such as vents, pipes, and electrical outlets, should be properly sealed to prevent moisture from entering and creating an ideal environment for mold growth. Use caulk or sealant to seal around these openings and ensure the seal is tight and durable.
A low-odor caulk: https://www.amazon.com/GE-GE284-Silicone-Kitchen-Squeeze/dp/B000PSE46S/ref=sr_1_4?crid=X8JLJ95XL62O&keywords=ge%2Bsilicone%2B2&qid=1699391197&s=industrial&sprefix=GE%2B2%2B%2Cindustrial%2C179&sr=1-4&th=1
A helpful blog on non-toxic caulks and adhesives: https://www.mychemicalfreehouse.net/2021/07/chemical-free-glues-and-silicone-caulk.html
4. Cement Backing for Wet Walls
In areas where moisture is more prevalent, such as bathrooms and kitchens, cement backing should be used on the walls before installing tiles or other wall coverings. Cement backing provides a waterproof barrier that prevents moisture from penetrating the walls and reaching the studs- talk about a big bummer.
https://doveeyesphotography.mypixieset.com/
Additional Tips for Mold Prevention
VENTILATE! Ventilation is the lifeline of your home in more ways than one. Keep the air circulating to prevent any moisture buildup that entices mold to hang around. This is yet another reason to invest in an ERV (energy recovery ventilator) for your home. Read our previous blog post on air purification for more details regarding this amazing system.
Any leaks? Don't delay—act FAST to preserve the integrity of your home.
Maintain humidity levels below 60% to create an environment inhospitable to mold growth, preserving the sanctity of your living space. (An ERV can assist with maintaining consistent moisture levels in your home.)
Following any water exposure, leave no surface unchecked. Thoroughly clean and dry to eliminate any chance of mold taking root.
By integrating these mold prevention strategies during construction, you're not just building a structure—you're establishing a truly healthy home free from toxins and the potential health risks associated with mold. Let's come together and craft a home that supports you and your loved ones by protecting your health for the long haul.
To dive deeper into this subject, check out this helpful blog post: https://www.mychemicalfreehouse.net/2020/01/designed-for-mold-prevention-corbetts-tiny-house.html
P.S. Looking for more non-toxic home-building materials? Download “10 Non-Toxic Swaps For Your Custom Home”!

Non-Toxic Home Building: Insulation for Healthy Homes
Discover the best non-toxic home-building solutions in San Antonio. Learn about different insulation types, costs, and factors to consider. Make an informed decision for a sustainable and healthy home.
https://doveeyesphotography.mypixieset.com/
Today we are diving DEEP into non-toxic insulation for your healthy home-build. To briefly summarize:
Spray foam is considered the most effective for air sealing and resisting heat flow in the short term, but is saturated with chemicals/toxins and loses its integrity over time.
Fiberglass is the cheapest insulation option but has an average performance quality and often contains formaldehyde and fire retardants
Cellulose is another less expensive option that also contains few chemicals, however, it has a similarly average performance quality
Mineral and spray wool are considered the most non-toxic, have superior sound-proofing, the spray or blown-in option is highly effective for air sealing, and cost less than spray foam.
If building a non-toxic home is your goal, download “10 Non-Toxic Swaps For Your Custom Home”!
Read on for all of the details so you can make the best insulation choice for your non-toxic home.
The Concern for Toxins in Insulation
Insulation is one of the most important factors in keeping your home comfortable and the energy bill low. It helps to keep your home cool in the summer, warm in the winter, and can also help to reduce noise levels.
However, traditional insulation has been laden with chemicals in the form of formaldehyde and fire retardants. So how do you make the healthiest decision for your family and your home?
Today we are going to share an overview of the primary forms of insulation along with their respective advantages and disadvantages. At the end of the day, you will have to choose the insulation that supports your health, climate, AND budget.
Home Insulation Terminology
But first, let’s review some basic terminology:
R-value: The R-value of an insulation material measures its resistance to heat flow. The higher the R-value, the more effective the insulation.
Fire resistance: The fire resistance of an insulation material measures how well it can withstand fire. Insulation materials with a high fire resistance rating can help slow the spread of fire and protect your home in the event of a fire.
Air sealing: Air sealing measures how well an insulation material can prevent air leaks. Air leaks can reduce the effectiveness of your insulation and increase your energy bills.
Soundproofing: Soundproofing measures how well an insulation material can reduce noise levels. Insulation materials with a high soundproofing rating can help to create a more peaceful and comfortable home.
https://doveeyesphotography.mypixieset.com/
Primary Home Insulation Types
Fiberglass: Fiberglass is the most common type of insulation used in homes. It is made from thin glass fibers that are bonded together with a resin. Fiberglass insulation is relatively inexpensive and easy to install, but it can be irritating to the skin and eyes.
Cellulose: Cellulose insulation is made from recycled paper products, such as newspapers and cardboard. It is a good choice for homeowners who are looking for a non-toxic and environmentally friendly insulation option. Cellulose insulation is also relatively inexpensive, but it can be more difficult to install than fiberglass insulation.
Mineral wool: Mineral wool insulation is made from natural materials, such as rock or slag. It is a good choice for homeowners who are looking for a fire-resistant and soundproofing insulation option. Mineral wool insulation is more expensive than fiberglass or cellulose insulation, but it is also more durable and long-lasting.
Spray foam: Spray foam insulation is the most effective type of insulation available. It is made from a mixture of chemicals that are sprayed onto surfaces to form a seamless barrier. Spray foam insulation is very good at sealing air leaks and preventing heat loss. However, it is also the most expensive type of insulation and can be difficult to install.
Rigid foam: Rigid foam insulation is made from a variety of materials, such as polystyrene, polyurethane, and polyisocyanurate. It is a good choice for insulating walls, floors, and roofs. Rigid foam insulation is relatively inexpensive and easy to install, but it is not as effective at sealing air leaks as spray foam insulation.
Spray wool: Spray wool is a type of insulation made from molten rock or wool that is sprayed on surfaces to form a seamless barrier. It has a number of advantages over other types of insulation, including:
High R-value: Spray wool has an R-value of >4 per inch. This means that it provides excellent thermal insulation, helping to keep your home cool in the summer and warm in the winter.
Airtightness: Spray wool forms a continuous seal, preventing air leaks from occurring. This can help to improve energy efficiency and reduce drafts.
Fire resistance: Spray wool is non-combustible and has a high melting point, making it an excellent choice for fire protection.
Soundproofing: Spray wool can also help to reduce noise levels, making your home more peaceful and comfortable.
Wool is naturally mold-resistant
Factors to Consider When Choosing Insulation
There are several factors to consider when choosing insulation for your home, including:
Climate: The type of insulation you choose will depend on the climate you live in. If you live in a cold climate, you will need insulation with a high R-value. The R-value of an insulation material measures its resistance to heat flow. The higher the R-value, the better the insulation.
Budget: Insulation costs can vary depending on the type of insulation you choose and the amount of insulation you need. Fiberglass and cellulose insulation are the least expensive types of insulation, while spray foam insulation is the most expensive.
Fire resistance: If you live in an area with a high risk of wildfires, you may want to choose an insulation material with a high fire resistance rating. Spray wool and mineral wool insulation have high fire resistance ratings.
Soundproofing: If you are concerned about noise levels, you may want to choose an insulation material with a high soundproofing rating. Mineral wool and spray wool insulation have high soundproofing ratings.
Comparison Breakdown
The following table provides a comparison breakdown of the primary forms of insulation, including spray wool:
Insulation Type | R-Value per Inch | Fire Resistance | Air Sealing | Soundproofing | Average Cost
Fiberglass | 3.1-4.3 | Good | Good | Fair | $0.50-$0.90
Cellulose | 3.7-3.8 | Good | Good | Good | $0.60-$1.00
Mineral Wool | 3.2-4.3 | Good | Good | Good | $0.70-$1.10
Spray Foam | 6.5-7 | Excellent | Excellent | Fair | $1.20-$2.00 Rigid Foam | 4.1-7 | Excellent | Excellent | Fair | $1.00-$1.50
Spray Wool | 4.3 | Excellent | Excellent | Good | $0.90-$1.50
Non-Toxic Home Insulation Recommendations
If you are looking for non-toxic insulation, mineral wool and spray wool are good options! Both materials are made from natural materials, are renewable and sustainable, and do not contain any added chemicals or flame retardants.
Mineral wool is more budget-friendly while still remaining non-toxic and effective. Spray wool is a good choice for homeowners who are looking for the most effective insulation possible. However, both options are traditionally less expensive than spray foam.
Conclusion
The best type of insulation for your home is a personal decision that depends on your budget, climate, and specific needs. However, if it were up to us, we would choose between the spray-on options for rock wool and sheep’s wool. Some brands to consider are Havelock, American Rockwool, and Oregon Sheppard.
Here’s to having healthier homes!
P.S. Looking for more non-toxic home-building materials? Check out this blog post on plywood and download “10 Non-Toxic Swaps For Your Custom Home”!

Non-Toxic Home-Building: A Guide to Air Purification and Ventilation
Imagine a home where you can breathe easy, where your family's well-being is safeguarded, and where the indoor air is as fresh as the Hill Country breeze. In our quest to create non-toxic homes that resonate with your values, we explore the essential elements of air quality and ventilation systems. Discover how the right choices can lead to a healthier and more comfortable home for you and your loved ones.
Hey there, fellow home enthusiasts! If you're on a mission to create a beautiful, functional, AND healthy home for your loved ones, you're in the right place. As a follow-up to our last blog on non-toxic home-building foundations, we're diving into two vital components of crafting a non-toxic, comfortable refuge: air purification and ventilation.
Understanding Air Purification: What's Your Best Fit?
Alright, let's kick things off with air purification. There's a bunch of air purifiers out there, each with its unique value. Here's the lowdown:
HEPA Air Purifiers: These champs are excellent at nabbing tiny particles like dust, pollen, smoke, bacteria, and viruses. (Average Price: $100 - $500)
Electrostatic Precipitator Air Purifiers: They're your go-to for knocking out large particles, such as dust and pollen. (Average Price: $200 - $800)
Activated Carbon Air Purifiers: When it comes to tackling gases, chemicals, and odors, these are the pros. (Average Price: $100 - $400)
So, which one should you pick? Well, that depends on your specific needs. If you're battling small particles, HEPA purifiers are your pals. But if you're dealing with gases and odors, activated carbon purifiers are your trusty sidekicks.
But wait there’s more! Youu can also go for a combo purifier that wields multiple powers for a comprehensive air cleanse (this is the direction we would lean). Just remember, keeping those filters fresh, as per the manufacturer's instructions, is crucial to keep the purifier happy for the long haul.
HRVs and ERVs: Your Indoor Air Quality Allies
Now, let's switch gears to ventilation systems. You see, lousy indoor air quality can lead to all sorts of health issues. That's where Heat Recovery Ventilators (HRVs) and Energy Recovery Ventilators (ERVs) step in.
HRVs are great—they swap indoor air with outdoor air while also transferring heat, which slashes energy usage. ERVs, they're like HRVs with a bonus feature—they capture moisture from outgoing air for better moisture regulation. Perfect for those dry winter months.
And the great news is that you can buddy up these systems with your AC. In the summer, they give incoming air a nice little chill, lightening the load on your AC. When winter rolls in, they give incoming air a warm welcome, so your heating system doesn't break a sweat.
The Dynamic Duo: Ventilation and Air Purification
For the crème de la crème of indoor air quality, pair HRVs or ERVs with air purifiers. Air purifiers filter the air, removing pollutants like dust, pollen, and smoke. By using them in conjunction with ventilation systems, you can further filter the air, eliminating even smaller particles.
This combination is especially beneficial for allergy and asthma sufferers or those living in areas with poor outdoor air quality.
Top Tips for Making These Systems Shine
To get the most out of these systems, keep these tips in mind:
Place your purifier or ventilator in a central spot for optimal airflow.
Let 'em run round the clock, especially if allergies or asthma are a struggle.
Show those filters some love—replace them regularly as the manufacturer suggests.
Size and install your HRV or ERV properly to make sure it's a seamless fit.
Don't skip out on regular check-ups by qualified techs.
Follow these golden rules, and you'll be well on your way to creating a healthier and comfier home for your family.
Integrating air purification and ventilation is a fantastic step toward a happier, healthier living space. Whether you're combating particles, odors, or gases, there's a solution tailored just for you. By teaming up these systems, you'll be armed and ready to savor every breath in your home sweet home.
The Foundation of Non-Toxic Home Building: In-Duct Air Purification Systems
Creating a non-toxic home in San Antonio isn't a mystery. Breathe easy with an in-duct air purification system. Skip the hassle of room purifiers. Learn how we make clean, pure air a reality. Say farewell to toxins and welcome a healthier home with JD Rock Construction.
Creating a non-toxic home can feel like an overwhelming task, with a myriad of decisions to make. But, here's a secret: you can simplify the journey by focusing on one of the most critical aspects of indoor air quality – in-duct air purification systems.
Picture this: Instead of shelling out thousands of dollars for bulky air purifiers in every room, you can invest around $500 in an in-duct purification system that cleanses the air throughout your entire home. The best part? If you're building a new home from the ground up, the additional installation cost is almost negligible because your HVAC technician is already on-site.
Why is air purification a cornerstone of non-toxic home building?
Well, it's no secret that our indoor air can harbor undesirable particles. While we aim to minimize these pollutants, an air purifier steps in to bridge the gap where we might fall short.
But not all air purifiers are created equal. When considering an in-duct air purification system for your home, look for one that goes beyond the basics of dust and pollen. Seek out a system that filters out VOCs (Volatile Organic Compounds), which can emanate from common household items like paints, cleaning products, and furniture.
Mold spores are another concern for indoor air quality. A top-notch in-duct purifier should be efficient at trapping these potentially harmful particles. And if you have a bustling household with kids, consider a system that can tackle viruses, adding an extra layer of protection to your home.
So, why start with air quality when building a non-toxic home?
It's simple – because it's a foundational step that immediately impacts your well-being. When your home's air is clean and fresh, you'll experience improved health, fewer allergies, and greater peace of mind.
At JD Rock Construction, we understand that creating a non-toxic home can feel like a daunting task. That's why we're here to guide you, step by step, through this journey. With an in-duct air purification system in place, you're not only investing in your family's health but also simplifying the path to a non-toxic home that aligns with your values.
Ready to take the first step towards a cleaner, healthier home? Reach out to us today and discover how we can help you build the non-toxic home of your dreams.
Remember, it's not about overwhelming yourself with decisions; it's about taking things one step at a time and focusing on what truly matters – the well-being of your loved ones.

Building Your Family Home in the Texas Hill Country: What You Need to Know
Discover the charm of building your family’s custom home in the Texas Hill Country. We unravel the common challenges, from choosing the right location to navigating local regulations, and provide solutions to make your journey seamless. Let us guide you through budgeting wisely and developing raw land, ensuring your family's vision thrives and is protected amidst the Hill Country's beauty.
Do you daydream about a custom-built home nestled in the breathtaking landscapes of the Texas Hill Country? We understand the allure. The Hill Country's rolling hills, lazy rivers, and charming small towns make it a perfect place to build your family’s home (minus the scorpions- just keeping it real). However, before you embark on this exciting journey, let's address some common pain points and guide you through the process.
1. Choosing the Right Location
The Texas Hill Country is vast and diverse, offering a range of locations to build your custom home. From the vibrant cultures of San Antonio and Austin (with San Antonio being our favorite *cough *cough), the tranquil beauty of the Guadalupe River, and the rugged terrain and hills of Fredricksburg, the choices seem endless. But finding the perfect spot that aligns with your vision, your family, and your budget can be overwhelming.
Solution: Start with your vision. What kind of lifestyle do you want in the Hill Country? Do you crave the energy of the city or the peace of the countryside? Define your priorities, and use them as a filter to guide you to the right location.
Questions:
Access to amenities: Do you want to be close to town or in a more secluded area?
Land: Do you already have land in a particular location?
Neighborhood vs ranch: do you prefer an established neighborhood with established utilities?
Views: Are there any particular views that you're drawn to?
Soil conditions: Some areas of the Hill Country have poor soil conditions, which can make building a custom home more challenging. This is also an important consideration if you are considering homesteading.
Local regulations: Be sure to research the local zoning and building regulations in the area where you're interested in building.
2. Navigating Local Regulations
Every area within the Hill Country might have its own set of building regulations, zoning laws, and permits. This can be a labyrinth of paperwork, requirements, and phone calls with long hold times that leave you feeling lost.
Solution: Partner with a local custom home builder experienced in the Hill Country and gifted in communication who can handle the headaches on your behalf. They know the lay of the land, the regulations, and how to smoothly navigate the bureaucratic maze. They'll ensure your family’s home meets all the legal requirements.
3. Budgeting Wisely
Custom home building comes with unique costs. Understanding how to budget effectively can be challenging, especially if you're not familiar with the local construction market.
Solution: Work with a builder who understands your budget constraints and can recommend cost-effective alternatives without compromising quality. They'll help you create a realistic budget that aligns with your vision. This all begins with setting the right budget with the right buffer to mitigate financial stress so you can enjoy the building process with confidence.
4. Developing Raw Land
Similar to navigating local regulations, developing raw land can be its own confusing maze of bureaucracy and utility companies. You also want to make sure you are developing the best area of your land to maximize views of the surrounding hills while also considering optimal soil conditions.
Solution: Once again, choose a local builder and a local architect who are familiar with Hill Country construction, are aligned with your specific vision, and are able to navigate the requirements on your behalf.
Final Thoughts
Building a meaningful home for your family that lasts in the Texas Hill Country is an exciting journey, but it's not without its challenges. However, with the right tools, we believe you can overcome these pain points and execute your vision to best fit the Hill Country landscape.
If you're ready to embark on this adventure, JD Rock Construction is here to guide you every step of the way. Get in touch with us today and explore how our experience in custom home building in the Texas Hill Country can support your family’s vision for a life and home in this beautiful region.

A Refreshing Retreat Just Outside the City: Building Your Custom Home in Spring Branch
Discover the serenity of Spring Branch, Texas, nestled in the picturesque Texas Hill Country. As a reputable custom home builder in Spring Branch, JD Rock Construction guides you through building your dream home with piercing clarity. Embrace nature's beauty, connect with a thriving community, and design a home that suits your family's unique needs and values. Enjoy the perfect balance of country living with the convenience of nearby cities like San Antonio and Austin. Invest in a home that serves your family for years to come while embracing the beauty and peace of Spring Branch. #SpringBranchCustomHome #TexasHillCountry #JDRCconstruction #CustomHomeBuilder #SerenityAndConvenience #CraftingDreamHomes
Do you want to live in the beautiful Texas Hill Country, with its views and winding rivers, while also being a mere 25-minute drive from the bustling city of San Antonio? I do! And I am surely not alone.
Embracing The Nature and Adventure of Spring Branch
Growing up in San Antonio, Spring Branch used to be “so far away” (isn’t everything when you’re a child?!), but with a newly renovated highway, you can get to Spring Branch in under 30 minutes. Granted- this is from the North Central side of San Antonio, so if you are aching for some downtown life, this could be a bit of a hike. But, if you are looking for an escape to breathe (air without exhaust) and be refreshed by a unique blend of nature, community, and (still!) modern living, Spring Branch could be your answer!
Located right between Canyon Lake and Guadalupe River State Park, there is no shortage of stunning landscapes and adventures. Hiking, fishing, horseback riding, ziplining, spelunking, kayaking, tubing, wineries, distilleries, antiquing, THE LIST GOES ON. And, if you missed this the first time, you can still get to San Antonio in under a half hour!
A Community to Support Your Family in Spring Branch
Beyond its natural beauty, Spring Branch is a community that values connection and hospitality. You can cultivate a sense of belonging with friendly neighbors and various community events. Living somewhere you are known and loved, especially when growing a family, cannot be overemphasized!
A Spring Branch Custom Home Aligned With Vision and Values
Building a custom home in Spring Branch allows you to craft a home that aligns with your family's needs and values. Imagine that- starting your family’s home with piercing clarity of vision and an equally clear plan to create that vision. Building a home is an INVESTMENT, so we want you to be completely satisfied with a home that LASTS and SERVES your family.
Balancing Seclusion and Convenience With a Spring Branch Custom Home
The charm of Spring Branch truly comes down to its balance of being a peaceful retreat with the convenience of proximity to major cities like San Antonio and Austin. You can enjoy a little country living without cutting off the urban necessities and entertainment.
So, I’ll ask you again- could Spring Branch be the place for you and your family to grow?

A Blueprint for Success
In this blog post, we discuss the importance of a site plan in the custom home-building process. A site plan is a detailed drawing that showcases the layout of the property, its dimensions, and the relationship between the proposed structure and the surroundings. It plays a pivotal role in maximizing the potential of the property, ensuring regulatory compliance, integrating design with the landscape, managing budget and resources, and facilitating effective communication with contractors. Investing time and effort into creating a comprehensive site plan sets the stage for a successful and efficient home-building journey. Let your site plan be the blueprint for your dream home's success and your peace of mind!
Today we are talking about an ESSENTIAL aspect, the bedrock even, of the entire custom home-building process. It provides a comprehensive visual representation of the property and plays a pivotal role in ensuring the success of your custom home project. Any guesses?!
What is a Site Plan?! (In classic Jeopardy style)
You guessed it- A site plan is a detailed and scaled drawing that showcases the layout of the property, its dimensions, and the relationship between the proposed structure and the surroundings. It encompasses crucial elements such as property boundaries, topography, existing structures, utilities, landscaping, access points, and more.
Maximizing the Potential of Your Property
A well-thought-out site plan can unlock the full potential of your property. It allows you to optimize the use of available space, taking into account the natural features of the land. Understanding the topography, soil conditions, and drainage patterns through the site plan enables you to position your home in the most advantageous way. By aligning the design with the natural landscape, you can capitalize on scenic views, capture natural light, and implement energy-efficient strategies.
Ensuring Regulatory Compliance
Custom home construction must adhere to various local regulations, zoning codes, and building ordinances. A site plan serves as a critical tool to ensure your project complies with these requirements. It helps you determine setbacks, height limitations, and other building restrictions that may apply to your property. By starting with a well-designed site plan, you minimize the risk of costly delays, redesigns, or even potential legal issues down the road.
Seamless Integration of Design and Landscape
A harmonious relationship between your home's design and the surrounding landscape is essential for creating an aesthetically pleasing and functional living space. The site plan acts as a bridge between the two, allowing architects and landscape designers to collaborate effectively. Proper planning ensures that outdoor areas, such as gardens, patios, and pools, blend seamlessly with the architecture, fostering a unified and inviting atmosphere.
Budget Management and Resource Allocation
Constructing a custom home involves significant financial investments. A site plan helps you allocate resources wisely by offering a clear understanding of the construction requirements. It aids in determining the best locations for utilities, such as water and electricity connections, reducing the cost of extending infrastructure. Moreover, by considering the site's challenges and opportunities from the outset, you can anticipate potential additional expenses and plan your budget accordingly.
Effective Communication with Contractors
Effective communication is PARAMOUNT when building a custom home! The site plan serves as a visual reference that helps you convey your vision to architects, contractors, and other professionals. It minimizes misunderstandings and ensures everyone is on the same page throughout the project.
Conclusion
Don’t neglect the site plan! Its significance lies in its ability to maximize the potential of your property, ensure regulatory compliance, integrate design with the landscape, promote sustainability, and streamline communication. By investing time and effort into creating a comprehensive site plan, you set the stage for a successful, efficient, and peaceful home-building journey. Remember, the old adage holds true: "Failing to plan is planning to fail." So, let your site plan be the blueprint for your dream home's success and your peace of mind!

Getting Utilities on Raw Land: A Journey Through the Expected Costs
Planning to build your dream home on raw land near San Antonio? Discover the ins and outs of utility costs, including electricity, water, natural gas, and sewer (or septic systems). Learn about average price ranges, installation considerations, and valuable tips to navigate the process successfully.
Howdy landowners and future builders! Today, we are exploring the fascinating world of getting utilities on raw land.
We all know that bringing your dream home to life requires more than just imagination and a sturdy foundation. Maybe the need for developing raw land with utilities has never crossed your mind, but it's time to dive into the details you need to know.
The Key Components
Electricity, water, natural gas, and sewer (or septic systems for most areas) are the key players in the utilities game. The cost of getting these utilities on raw land near San Antonio can vary based on factors like location, type of service, and distance from existing lines. But fear not, we’re here to break down what we can!
Utility Cost Breakdown
Electricity: The power source that keeps your lights shining and appliances buzzing. Depending on your home's size and electrical needs, budget between $1,000 and $5,000 to connect electricity to your raw land.
Water: The life force that quenches your thirst and keeps your plants thriving. To get water flowing on your land, set aside around $1,000 to $5,000. Remember, the cost may vary based on your specific location and water service requirements.
Natural Gas: The energy source that warms your hearth and cooks your favorite meals. You'll typically need between $1,000 and $5,000 to bring natural gas to your property near San Antonio. Be sure to check with your local utility company for specific costs and availability in your area.
Sewer (or Septic System): Ah, the unsung hero of waste management. If you're in an area where a septic system is required, you'll be looking at an estimated cost of $10,000 to $12,000. Remember, this option offers you greater independence and flexibility when it comes to waste disposal.
Now, let's not forget about trenching and installation—you can expect to invest between $1,000 and $5,000, depending on the length of the trench and the type of utilities you're installing. It's essential to factor in these costs when planning your budget for utilities.
Keep in mind that these numbers are estimates! Reach out to your local utility company for accurate pricing tailored to your specific situation. They're the experts who will guide you through the process and provide the most up-to-date information.
Tips to Get Started
To help you on your journey, here are a few tips:
1️⃣ Contact your local utility company: They hold the knowledge of available utilities in your area and can provide detailed cost breakdowns.
2️⃣ Seek multiple quotes: Gather quotes from different contractors to ensure you get the best price for trenching and installation.
3️⃣ Be prepared for deposits: Utility companies may require a deposit before connecting your utilities, so plan accordingly.
4️⃣ Patience is key: Remember, Rome wasn't built in a day, and neither will your utilities be connected overnight. It may take weeks or even months to complete the process. Stay positive and stay patient.
So, future custom homeowners, keep your dreams alive, stay informed, and remember that the reward of having your own peaceful oasis is worth the time and money invested. By understanding the costs involved and following these tips, you'll be better equipped to navigate this part of your journey!
If you have any questions or need further assistance, feel free to reach out. We are here to support you every step of the way. Happy building!
P.S. If this is overwhelming and you want nothing to do with setting up your utilities- we hear you! We offer a preconstruction package in which we handle the nitty-gritty details of developing your raw land so your mind can rest easy. Schedule a consultation call and ask all about how this package could work for you!

Navigating Change Orders for a Smooth Custom Home Build
Today we are discussing the world of change orders in custom home building. Change orders allow for flexibility during the construction process while protecting the overall integrity and quality of the home.
Welcome! After a few week hiatus, we are back and ready to talk all about the world of change orders in custom home building. In this post, we'll shed light on what change orders are, how they are priced, and why builders include a profit margin. We hope you walk away with a better understanding of this essential aspect of custom home building.
What is a Change Order?
A change order is simply a request from the client to make a change to the original plans or specifications. These changes can range from minor adjustments to significant additions. For instance, a client may decide they want to include crown molding in their home despite it not being part of the initial plan. This request initiates a change order.
How are Change Orders Priced?
Change orders involve additional costs that need to be accounted for in the project budget. Pricing change orders must consider both labor and material costs. While specific pricing methods may vary, our standard of practice is to add a 25% profit margin to every change order. This process should be outlined in the construction contract between the builder and the client.
To better understand the pricing method, let’s revisit the example of adding crown molding. Suppose the additional labor cost for trim carpentry and paint is $1,500, and the added material cost is $1,000. The cost of this change order would amount to $2,500. But we have not yet added the profit margin. To determine the total cost to the client, including the 25% profit margin, we divide $2,500 by 0.75, resulting in a grand total of $3,333.33.
Why Include a Profit Margin?
You may wonder why builders include a profit margin for change orders. Rest assured it is NOT because we are greedy! When changes are made to the plans, the builder must:
Obtain material and labor pricing: Research and collect updated prices for the new requirements.
Address schedule modifications: Analyze how the change order will impact the project timeline and adjust it accordingly.
Seek client approval: Present the change order details to the client and await their agreement.
Revise contracts and coordinate: Adjust labor contracts and coordinate with subcontractors or additional trades if needed.
Procure and deliver materials: Order necessary materials and transport them to the job site, often using company resources.
Supervise and ensure quality: Oversee the work and maintain quality control throughout the change order process.
Communication and updates: Keep the client informed about the progress and any potential impacts on the project.
The profit margin allows builders to cover the time, effort, and resources required to manage change orders effectively, while still delivering a high standard of service.
Change orders are an integral part of construction projects, providing clients the flexibility to adjust plans and specifications. We understand that change orders can sometimes seem costly, but it's essential to consider the time, effort, and resources required to implement these changes effectively. Our aim is to provide exceptional service and deliver results that align with our clients' visions, even when adjustments are made along the way. Above all, our priority is protecting your peace of mind so you can enjoy building your custom home!

How to Build Your Home FAST
A delay in material selections for a custom home will delay the whole project. If all of the materials are selected up front, the builder can purchase proactively and swiftly churn through the work. The result is a home-building journey with decreased stress and increased speed- a win-win!
In my personal experience, the single biggest reason projects take longer than anticipated is due to delays in material selections. Now, this may sound like I am blaming the client. FALSE. I am blaming the builder (me). I failed to communicate the importance of timely selections and deadlines. That ends today! It is imperative that ALL material selections be made by the client by the time the house is framed. In fact, by the time the foundation is poured, most selections should be made.
That may sound a bit ridiculous to some of you. That is so early in the construction process!!! To help you understand, allow me to explain what happens between you making a selection and the material being installed. Let’s take tile, for example. Here are the steps that must happen to install your selected tile:
A material “takeoff” needs to be performed. A material takeoff is when measurements are taken from the house plans to determine the needed quantity of a certain material (i.e. tile). Plans do not tell you the square footage of tile in a specific area (i.e. shower). A material takeoff must be performed to determine this quantity. It is simple mathematics, but it does take a bit of time – especially when multiple materials are selected for a certain area. (TIME FOR THIS STEP – 3 TO 5 DAYS)
Retrieve quotes from tile vendors. Once we know the exact amount of tile needed, we can send a quote request to the desired vendor. (TIME FOR THIS STEP – 3 TO 5 DAYS)
Request pricing approval from the client. Since most material selections are linked to “allowance items” (see our earlier blog post about allowances), the client must approve the cost of a material before it is purchased. Continuing the tile example, if there was a $10K allowance for tile material, and the vendor’s quote came back at $11K, then the builder must receive written approval from the client regarding the overage. (TIME FOR THIS STEP – 3 TO 5 DAYS)
Purchase material. Once the quotes are reviewed by the builder and approved by the client, it is time to purchase the material! Very rarely are materials like tile in stock and ready to be picked up. They can have a lead time of a week to months, depending on the tile. (TIME FOR THIS STEP FROM PURCHASE TO READY FOR PICKUP – 3 WEEKS ON AVERAGE).
Install material. (TIME FOR THIS STEP – 5 DAYS)
The steps above must take place for every single material that needs to be selected for your home. As you can see in the tile example, it would be very unwise to wait until the builder was ready for the tile to be installed to make your selection. If you wait that long, there will be major project delays. If all of the materials are selected up front, the builder can purchase proactively and swiftly churn through the work. The result is a home-building journey with decreased stress and increased speed- a win-win!

Start With a Budget, NOT a Floor Plan
It is MUCH easier to build a custom home floor plan based on a budget than it is to chisel away at an expensive floor plan. You will almost certainly be over budget on your construction project if you go with the latter option.
It is MUCH easier to build a floor plan based on a budget than it is to chisel away at an expensive floor plan. You will almost certainly be over budget on your construction project if you go with the latter option.
At JD Rock, we push peace of mind above all else. If you cannot pay for your “dream home” with peace of mind, it will turn into a nightmare!
Now, it probably goes without saying that the more expensive the custom home, the more the builder will profit. But as the builder, we are here to say that we would rather you build the less expensive home with less stress than sacrifice your peace and max out your budget.
We at JD Rock obviously do not know your personal financial situation – so it is up to you to do your homework and determine what you can afford. We recommend a build budget at least 8% lower than what you are pre-approved for at the bank. So, if your bank approves you for a $700,000 construction loan, we recommend not to exceed a $644,000 contract with a builder ($56K less than your approved amount). We know this sounds crazy- but by doing so, you are setting yourself up for peace of mind. When it comes time to make finish-out selections for your home (flooring, fixtures, appliances, etc), you can feel the freedom to splurge a little. However, don’t forget about all the sneaky expenses at the end of the project like paying movers to haul in all of your furniture. If you are renting a home during the build, is the timing going to align so that you never pay a mortgage and rent check the same month? If not, have money allocated for this! Are you going to want to host a party or two in your new home once you are settled? Prepare and don’t let yourself be house rich while cash poor (all your money is locked up in your home).
Again – we push peace of mind above all else. Your family will experience peace and joy in your home when you live within your means. An extra 500 square feet of living area will not produce lasting joy. Neither will a $12,000 refrigerator. Chase peace and joy, don’t chase the Joneses.

Are you ready to build a custom home but don’t have a full set of plans?
We explore the two pre-construction pathways for obtaining a full set of plans for your custom home.
How exciting!! You’re ready to build. Maybe you’ve found a floorplan online you like but want to make a few changes. Or maybe you have started talking to an architect to get some rough plans drawn up. We have an earlier blog post detailing the difference between online plans and hiring an architect you can check out, but either way- you’re on the right track! At this point, you have 2 different paths to choose from for the pre-construction phase. You need to have a full set of plans before signing a contract with a builder, and there are two ways to go about obtaining these plans.
A Full Set of Plans
*full set of plans to include (at a minimum) the following:
Site plan – including flatwork & utilities
Floor plan
Reflected ceiling plan
Roof plan
(4) exterior elevations
Electrical plan
Engineered foundation plan
Engineered structural framing plan
The Two Pre-Construction Paths
Path 1: Manage the design phase yourself.
Path 2: Sign a design agreement with a builder.
There is no right or wrong option here. It is totally up to you and your specific situation! We’ll try to lay out the details of each path so you can make the decision that is right for you.
Path 1: Manage the design phase yourself.
Our very first client at JD Rock took this path, and we had an amazing experience with them! Over the course of several months, they took the time to have an architect draw up plans for their custom home and corresponded regularly to ensure every detail was just right. Next, they hired an engineer to engineer the plans. Then, they sent their full set of architectural and engineered plans to multiple builders to bid on their custom home. Thankfully, we won the job and got to work with these wonderful people! The project went smoothly because all of the plans were finalized before we started construction.
I would note – for this project, there was no HOA or official city to deal with. This made the pre-construction phase much easier as the client did not have to seek approval from these entities.
Path 2: Sign a design agreement with a builder.
The second option for the pre-construction phase of your custom home is to sign a design agreement with a builder. This option would work best for somebody who may not feel totally confident managing an architect and engineer on their own. A design agreement hires a builder to manage and coordinate with you, the architect, and the engineer to design the ideal home for you – providing cost projections along the way. By involving the builder early in the process, you’re avoiding the potential mistake of designing a home that is thousands of dollars (or more) over your budget. Just to be clear – a design agreement does NOT necessarily lock you into using this builder to construct your home. At the end of the design phase, you could submit your finalized plans to other builders for pricing and choose the best deal.
So again, there is no right or wrong option here. You need to decide how hands-on you want to be, and how confident you are in managing the pre-construction phase on your own. Ultimately, choose the option that allows you to sleep in peace at night. We will never stop encouraging you to choose the path with the most peace of mind.

Fun and Practical Features to Include in Your Custom Home
If you are planning to build a custom home, you don’t want to miss these fun and practical features to include!
Are you planning to build a custom home soon? We’ve got some fun and practical ideas for you to consider…
Coffee Bar in the Main Bedroom
For you coffee drinkers out there, consider this! How nice would it be to not have to leave your bedroom to get your coffee in the morning? Talk to your architect about running plumbing and electrical to a little nook in your bedroom for some early morning cappuccinos.
Indoor Gun Range
Yeah, we said it. If you have flexibility in your budget, include space for your hobbies in your home. An indoor gun range may not be as expensive as you think – it is actually fairly simple to construct (and yes – it is legal). You can buy a target retrieval system online for less than $1,500. Once all of your walls are soundproofed and padded, and the right lighting is in place – you’re all set for many hours of fun!
Splurge on the Main Shower
Get the rain showerhead. Throw in a body spray or two. Add another showerhead in case you don’t like showering alone. Install a recessed light with a built-in Bluetooth speaker so you can listen to your audiobook. All of these splurges are well worth the minimal extra costs.
Central Vacuum System
Once again – another minimal cost with a high payoff would be a central vacuum system. It is such a pain to have to go grab your vacuum cleaner and plug it in just to vacuum some crumbs off the floor after dinner (parents of toddlers- I know you feel this). Consider installing a central vacuum system with built-in vacuums for all the main rooms of your home!
Hot Tub
Do we really need to sell you on this one? Turn Netflix off, invite your friends over, and end your day in the hot tub on your back patio. You’ll thank us later.
We hope these added flourishes bring you so much enjoyment during, and long after, your custom home build!

A Simple Way to Save $ on Your Custom Home
Want a simple but effective way to save money when building your custom home? Today we are diving into one of the easiest budget-saving tips.
We will say it again and again- we are here to help you enjoy the process of building your custom home, and saving money/staying within your budget significantly impacts that enjoyment. So today’s money-saving tip is pretty simple – build a two (or even 3) story home. Why? As of March 2023, concrete is expensive and wood is cheap (at least cheaper than it used to be). It’s that simple.
Let’s say you want 2,400 ft² of living area. Here are two options to consider:
Option 1 – 1 story
Option 2 – 2 story (1,200 ft² per floor)
In Option 1, you’re going to spend money on a 2,400 ft² concrete foundation – as well as covering 2,400 ft² of surface area with a roof.
In Option 2, you’re only going to spend money on a 1,200 ft² foundation – and only cover 1,200 ft² of surface area with a roof.
Because concrete is the expensive beast these days, cutting the foundation's square footage in half by stacking two floors on top of each other could save you around $25,000!
We’re not trying to pressure you into a certain look, just offering some food for thought. You can keep the exact same size home while cutting the foundation (and roof) cost in half. This allows for a beefier budget in other areas like appliances, flooring, etc.
In a few years, these numbers could completely flip; however, we want you to enjoy your custom home build today! And today, concrete is more expensive than wood.

Custom Home Building Concepts You Need to Know - Allowances
Understanding budget allowances early in your custom home building process will prevent painful surprises later. We discuss what allowances are and how to make an informed decision before signing a contract.
What’s an allowance? When you sign a contract for a custom home, the builder will usually give you several “allowances” for various components of the finish-out. For example, the budgeted allowance for appliances could be $20,000. Therefore, your home would be built, per plan, with $20,000 included in the budget for the purchasing of appliances. This way, you can shop around and pick whatever appliances you desire. But beware- if your appliances of choice exceed $20,000, you will be responsible for covering the price excess or have to select cheaper appliances. Conversely, if the quoted price for appliances comes back at $15,000, then the builder would write you a check for $5,000 at the project’s end.
So, when a builder sends you a proposal, be sure to carefully review all of the included allowances before signing a contract. Usually, the following items fall under the category of an allowance:
Appliances
Plumbing fixtures
Tile
Flooring
Countertops
Lighting
Rock material
Door Hardware
Mirrors
Toilet and bath accessories
Make sure you’ve done your homework regarding these allowances before signing a contract. You may have always had your heart set on a certain wood flooring (not knowing that it costs $15/SF). If the builder lists the wood flooring allowance at $8/SF, you are going to be very bummed when you realize how much your dream wood flooring costs – forcing you to settle for something else (or cough up thousands of dollars unexpectedly).
Here are some easy and practical ways to do your homework:
Shop online. Build a spreadsheet with all the appliances you like and estimate how much you need budgeted for your fridge, oven/range, dishwasher, washer, dryer, etc.
Go visit a showroom. There are a multitude of local vendors around you. Go visit one of their showrooms and ask for a sales representative to show you around. This way, you can touch and feel products to determine what you really like. The sales rep can very easily put pricing together for you.
Enlist the help of an interior designer. This is just one of the many ways an interior designer can assist in the home building process. Check out our blog from a couple of weeks ago for an in-depth analysis of interior designers and their benefits.
As always, we are here for your peace of mind and hope this information blesses your construction experience!